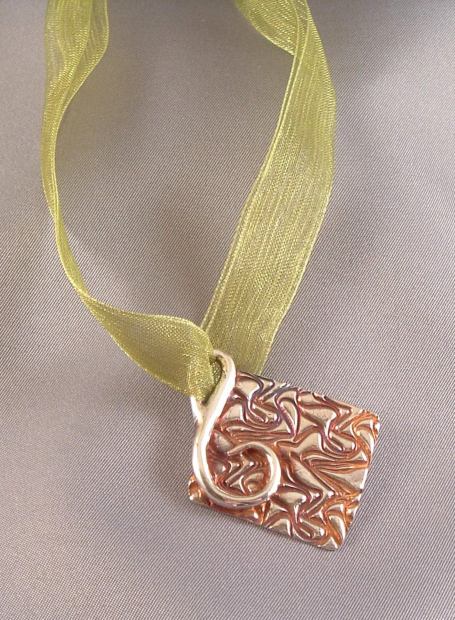
Rain, Bronze and Crochet?

Just a few thoughts this morning as I contemplate the fall collection.  We’ve had so much rain these past few weeks that instead of living in the deep South, maybe I’m really living in the Amazon rain forest.  But of course, if I start thinking along those lines, I start feeling some new inspiration with the new designer stones that I just got in for the fall collection.  Lot’s of rich colors, deep hues and fabulous shapes.

However, bronze clay work is taking over my workshop this week.  I’ve finally decided that I much prefer the Fast fire Bronze Clay the best as it takes textures so well.  I’m playing around with some abstract florals on one of the bracelets and on another bracelet I’ll be playing around with torching the metal for color changes.  Pictures will follow!

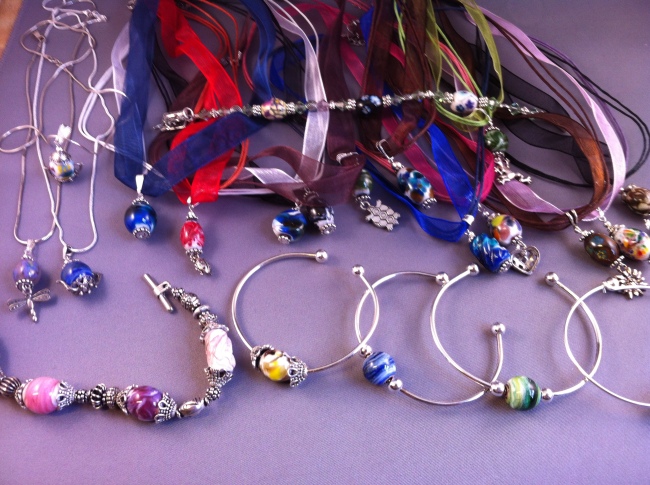
Today, I plan on putting up a video of how I make my enamel glass beads.  It’s a rough video as I don’t like playing around with editing, but you’ll see the process.  Enameling continues to surprise me as each bead is made.  Here’s a sample of the last set of beads in their designs:

Image

Be sure to check out the video of the my process in making these beads.  Click on the upper tab for “Videos”.


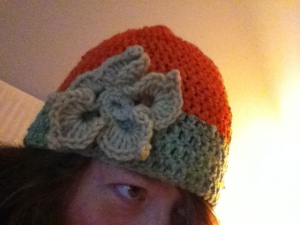
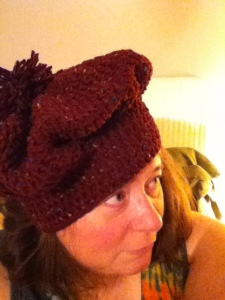
With all the rain, and sometimes my lack of work in the workshop, I’ve picked up another hobby of mine . . . crocheting!  It has satisfied my need to work with my hands and I’ve loved making all kinds of hats and fingerless gloves . .here are some samples.  I might have to set up a booth to sell all of these by Fall!

IMG_0927 IMG_0959 IMG_0971

Well, it is not raining now, so off to the workshop to sand some bronze and make a few silver rings. 

Of Beds and Beads . . .

Well, little did I know that my current medicines were working against me and landed me in the hospital for a few days due to my kidneys not working right!  What a surreal experience, but thankful to be back on my feet and just completed a stint at the Unicoi Lodge (one of my favorite places to be) showing off enamel bead bead making.  In fact, we did a video of the process and hope to have that up soon.

picking up enamels

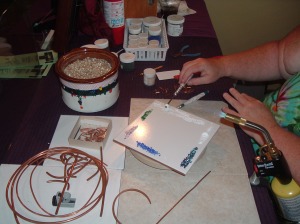
Here’s a snapshot of my work area set up at Unicoi–the torch certainly draws an audience.

festival of color

Here’s is one of my gallery pieces that specially showcases the variety of beads I can make and all the color tones that are possible.  While I am focused on my metal clay work right now, enameling has always held a special love for me.  As a designer I can truly create colors (much like an oil painter) with my torch and glass.  It is fun still to this day and I love teaching it as much as possible.

Thank you for your support and encouragement!  I’ll be preparing for the Butternut Creek Festival in Blairsville coming up on July 20-21st as well as continued bed rest . . .sigh!   I’ll work on getting the video up soon.

Visit the shop at http://www.etsy.com/shop/reflections1


Working with Organics

I’ve shared a little about how I do my leaves and flowers, but thought I would share my success in the studio from this morning.  One of my absolute favorite techniques is working with the metal clay and pasting it to a consistency that works for whatever organic I am using.  There are many things to consider . . so here’s what I did today:
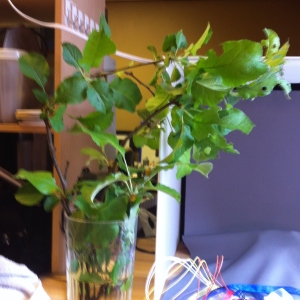
leaves

First step is to find those treasures in nature.  I picked a couple of small branches from my apple tree (crab apple, I believe) and put them in water immediately.  You want your organic piece to be as fresh as possible.  If you are driving along, bring some paper towels and plastic bags for things you find.  You can wet the towel in the bag and keep the flower or plant going till you get home.  I often do this on my travels to and from shows.  I’ve picked up moss, cotton bloom, cotton leaves, acorns, pine cones and such.
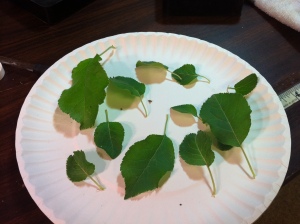
leaves 1

Next, you want to pick the best of the bunch you are working with.  For this round, I was looking for the smaller baby leaves to use for earrings and rings.  Then I picked a couple of larger leaves for pendants.  As I’ve said before, spring is the best time to pick flowers and leaves.  They are new, strong and fresh.  You want leaves that are strong and I like keeping the stem to use as my holder as I paste the leaf.
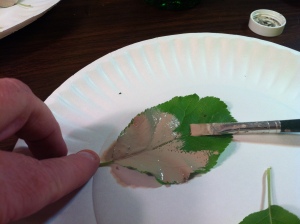
leaves 0

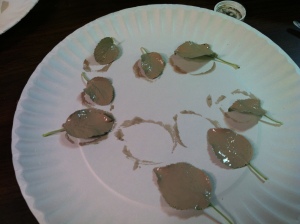
I begin with a light coat of really watered down paste so I can see what the leave will do.  Some leaves are just not cooperative–those that have VERY high finish/glossy (like magnolias) or leaves with lots of fuzzy surfaces.  This leave always does well as it has a nice textures with lots of vein structure.  Work with the natural folds of the leaf as you continue the layers, because as the leaves dry, they will begin to curl–you can work with some curl, but if it curls too much you risk cracking the paste as it drys.
leaves 2

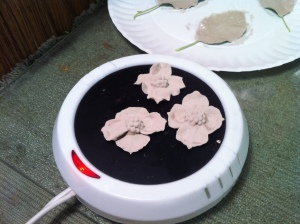
I ended up putting about 4-5 layers on these this morning.  I used my cup warmer and put my paper plate right on it to speed up the drying process so I could do more layers.  The quicker you begin the layers, while fresh, the better the results.  Paper plates are GREAT and are easily moveable in the studio space.
dogwood on warmer  IMG_0840  IMG_0845

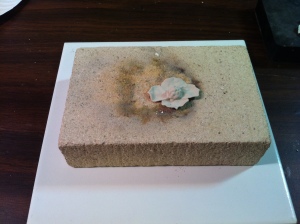
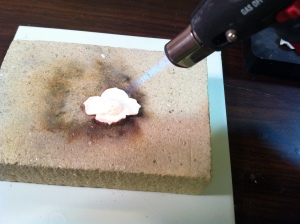
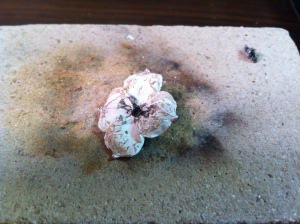
Back to work on my dogwoods for last week.  I decided to put on a few more layers and dried them on the warmer.  Then I began my hand torch work.  I’ve actually did a video of this and will post it later this weekend so you can actually see the action.  It is important to keep things safe, so I put my firebrick on my tile which is then on a pottery turn wheel so I can move the whole thing easily while torching.  I use a small, hand butane torch.
IMG_0846  IMG_0850  IMG_0849

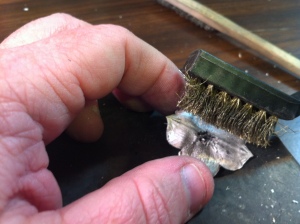
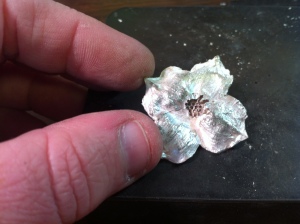
After firing, let it cool and then test it against glass to make sure the silver is solid.  You’ll hear that lovely “ding” sound and all is good!  I use a medium and small steel brush to gently brush away ashes, flecks and the white from the pasting–you’ll reveal the silver when you do this.  Some folks like to leave use this technique for a matte finish, which is fine.  But I like working with glossy finishes and for me, tumbling the silver gives it strength and you can be sure all the paste and ashes are gone.  I also love the dogwood flowers, because if you’ll look closely at the third picture above, you’ll see the honeycomb like texture of the burned out seed pods.  Cool!
IMG_0851

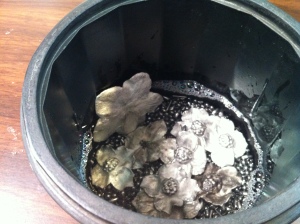
They are now all getting a bath in some steel shot, burnishing fluid and water in a my heavy duty tumbler.  I am going to let this tumble for most of the day and then we’ll see what happens next!  Look for my video in my next post!

Springtime Beauty

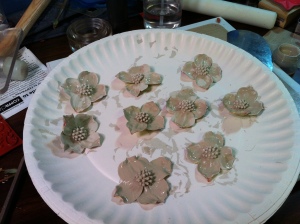
I often find many of my organic pieces in the spring when they are fresh and new. It is best to work the clay into a paste that matches or is supported by the actual item you want to make. This process takes time, patience and practice! It is almost intuitive when you have to decide just how many layers a piece will take.  Dogwoods are one of my favorite flowers to work with.  This year, instead of picking just one or two larger ones, I went earlier and picked about 9 really strong “baby” ones.  I find that using distilled water and glycerin will thin down the paste really well–but you have to keep it mixed thoroughly.  Also, in these slow economic times, I save all my silver “sawdust” and make paste out it.  This last batch made up about 6 oz which saved me over $180 in supply!  But, it took time and patience to get the consistency right and the paste smooth.  Also, be sure to have the right brushes to really apply the paste in all the nooks and crannies of an organic piece.

IMG_0774

This shows you the current collection of dogwoods I am working on.  I paste one to two layers each time I’m in the studio.  You can speed up the drying process by putting on a cup warmer and then paste again.  How many layers?  Well, until you feel that it will be strong enough during firing!  That’s the art part, not the scientific answer.

IMG_0776

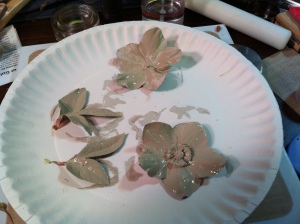
Here are my lenten roses from our new yard that I thought I would try.  Much larger and the first couple of layers of paste didn’t take well–but I pressed on and kept working it and after you get about 4-5 layers of dried paste, it becomes easier to bulk it up.

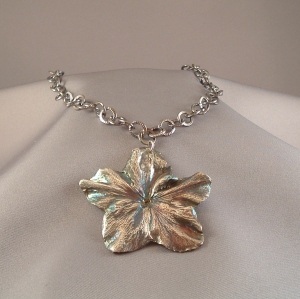
I’m still working on these pieces but here is one of the roses that I finished for the last show . . .

az

I hand torch the organic pieces to control the amount of time and burn and also do some flattening in the process to make sure the finished piece doesn’t have sharp curves or edges–also filing after firing helps in this area.  I don’t drill a hole until it is tumbled after firing to harden the actual metal.  With this rose, I oxidized with coffee and liver of sulfate!  Awesome midnight colors came to surface with a light polish and paired with a black steel hammered chain.

If the organic makes it to the show looking like this . . . well . . springtime beauty is well worth the wait in my opinion!

Turning a Mistake into Art

My first attempt to mix metals prior to firing really turned into a disaster . . .at the time of fabrication, that is. I created a solid copper cuff with a light raised texture to it and then did a few pieces of very thin bronze clay and attached them with slip to the copper cuff. My goal was for the bronze to sinter in with the copper cuff during firing.

Well, when it came out of the kiln, the copper cuff was beautifully solid, however the bronze attachments did not sinter on the surface, only on the bottom. Sighing, I decided to use my pick and drill and take off all the charred remains of the burned bronze and try smoothing out the metal that did melt in. I used one of my strongest drill sanders and proceeded to smooth it out and it suddenly became an interesting abstract pattern.

I am looking and at this and wondering if I could really make this become something special instead of a trashed scrap. I continued to buff, sand and smooth with the pattern and then tumbled it overnight to really give it a good finish. Guess what? It was really cool looking at that point. To make it even more exciting, I used my finger and pasted in a patina guilders paste to make the effect of “weathered” copper–it really was a worked over piece! After sealing and buffing, I was like . . .WOW! This is a really cool bracelet.

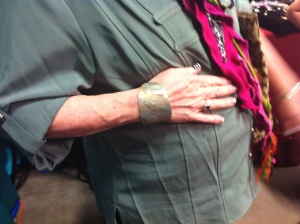
It was one of the first pieces that sold at my last show . . .what a great way to learn the process of just giving in to the way the piece is headed and not always my preconceived idea of what it should look like. And the woman that put it on, it was a glorious feeling of joy and accomplishment! She looked awesome in it!
antiqued copper

Front view of the piece (can you see the bumps of bronze?)

DSCF7231

Back view of the piece–smooth beautiful copper

IMG_0802

Not only did it fit her perfectly, but the colors were FANTASTIC!


Welcome to my world of art and jewelry!

Image

I plan to share with those that are interesting about my process and journey as an artist and how I love to design and create interesting and one-of-a-kind pieces.  My goal is to bring joy in all my work and to share what I learn and pass that knowledge on.  I hope you will enjoy being a part of this journey and thanks for being interested!  By the way, this is one of my pieces from last year which proved to me that I simply cannot sketch my designs–my work is very organic and I’ve learned how to keep it that way.  More about my processes in future posts!